
Creating a flexible selection dialog with WindowsForms and ListBox in Inventor-rules
A selection dialog that automatically displays the names of most Inventor API objects, returns the selected object and DialogResult, and is customizable
Links on the topic: The Video about the flexible Inventor-API selection dialog at Youtube or DailyMotion .
Why a self-built selection dialog?
The Inventor API offers only the iLogic InputListBox or the InputListBoxDialog to let users choose something from a list. These require a list of strings or objects, whose .ToString. To compensate for this, I know only the workaround proposed by Jelte de Jong, which is sufficient for many cases: First, all objects in the list are wrapped in new objects of a wrapper class with a customized .ToString method, and then the InputListBox is passed a list of wrapper objects, which sometimes seems a bit cumbersome.
In addition, the return value of the InputListBox is then a wrapper object and not the object with which you continue to work.
If you declare an InputListBoxDialog and call ShowDialog, you can get a DialogResult and access some properties such as the selected object and the selected index after closing the dialog. However, apparently there is no way to influence the content of the displayed list here either, as it is filled only after the call to ShowDialog. So you cannot exchange the displayed strings for the actual object names.
That is why I wrote my own SelectionDialog class, which reads and displays the usual name properties from a list of objects, returns the selected object and also the DialogResult. Since the dialog is created as an object as usual with WindowsForms before it is displayed, all properties of the dialog can be adjusted.
Here I explain the code section by section first, at the end follows the complete code.
Main method and use of the dialog
First the introduction: We import the window management for Windows apps and Reflection to be able to query type properties. Then comes the main method. These are the prerequisites for using the SelectionDialog class.
In order to place the dialog in the middle of the Inventor main window, we need its geometry.
Imports System.Windows.Forms
Imports System.Reflection

Sub Main()
    Dim invApp As Inventor.Application = ThisApplication
    Dim width As Integer = invApp.Width
    Dim height As Integer = invApp.Height
    Dim links As Integer = invApp.Left
    Dim oben As Integer = invApp.Top
    Dim windowCenter As Point2d = invApp.TransientGeometry.CreatePoint2d(links + width \ 2, oben + height \ 2)
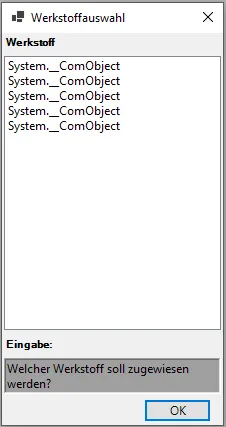
Then the parametrically typed dialog window is created. What exactly happens there will be explained in the class explanation. In this case, a list of materials is to be output, which are contained in an arbitrarily chosen material library as an example. The dialog window size is adjusted to the number of materials with the adjustment method. The height is the height of the Inventor window, because I was not able to read the screen height from Inventor. The same applies to the position, which is set to the center of the Inventor window. One button is renamed.
    Dim materialSelectionDialog As New SelectionDialog(Of Asset)(invApp.AssetLibraries(2).MaterialAssets)
    materialSelectionDialog.Text = "Select material"
    materialSelectionDialog.ButtonOK.Text = "Select"
The next section shows the created dialog modally, waits for input and processes the user selection. If the user chooses "OK", the selected asset is stored in the variable material. If a material has been selected, its name is output; here, of course, something would normally happen with the selected material. In case of cancellation, a message is logged and the subroutine is ended. This could also be done earlier if you check for DialogResult.Cancel.
    Dim material As Asset = Nothing
    Dim response As DialogResult = materialSelectionDialog.ShowDialog()
    If response = DialogResult.OK Then
        material = materialSelectionDialog.SelectedItem
    End If
    If material IsNot Nothing Then
        Logger.Info(material.DisplayName & " selected.")
    Else
        Logger.Info("No material selected.")
        Exit Sub
    End If
End Sub
Structure of the dialog
The next code section defines the core of the topic: The SelectionDialog class, which inherits from Form (a Windows window) and was mostly automatically generated by Visual Studio. It also
uses a generic type T. The type allows us to return exactly the object we received in the list. The controls ButtonOK and ButtonCancel as well as properties for the selected index (SelectedIndex), the selected element (SelectedItem), an adapter (Adapter; more on that later) and the items to be displayed (Items). The SelectedItem should take the parametric type. The constructor of the class initializes the dialog by determining the number of elements in the passed IEnumerable. Different methods are tried to determine the number (Length property, Count property, Count method or by iteration) because there can be different types of object collections in Inventor. If no direct way to determine the number is found, we simply count through.
Public Class SelectionDialog(Of T)
    Inherits Form

    Private ReadOnly ListBox1 As New ListBox()
    Friend ButtonOK As New Button()
    Friend ButtonCancel As New Button()

    Public Property SelectedIndex As Integer
    Public Property SelectedItem As T
    Private Property Adapter As IObjectAdapter
    Private Property Items As IEnumerable

    Public Sub New(items As IEnumerable, Optional adapter As IObjectAdapter = Nothing, Optional startIndex As Integer = -1)
        Dim count As Integer = 0
        Dim listTypeInfo As Type = items.GetType()
        Dim prop As System.Reflection.PropertyInfo
        prop = listTypeInfo.GetProperty("Length")
        If prop Is Nothing Then
            prop = listTypeInfo.GetProperty("Count")
        End If
        If prop IsNot Nothing Then
            count = prop.GetValue(items)
        Else
            Dim met As System.Reflection.MethodInfo
            met = listTypeInfo.GetMethod("Count")

            If met IsNot Nothing Then
                count = listTypeInfo.GetMethod("Count").Invoke(items, Nothing)
                count = met.Invoke(items, Nothing)
            Else
                For Each item As Object In items
                    count += 1
                Next
            End If
        End If
Determining the evaluation type for creating the list display
This section determines how the elements should be displayed in the ListBox. If no adapter was passed, the code tries to automatically determine the values to be displayed. To do this, it checks whether the elements have a DisplayName property, a Name property or a ToString method. If an adapter is present that contains the method for creating the string list, this is used for display. The code dynamically accesses the properties of the objects at runtime and handles exceptions if the expected properties are not present. Which display option was chosen is determined in the Enum evaluation.
        Dim evaluation As EvaluationType = EvaluationType.NoEvaluation
        Me.Items = items
        If adapter Is Nothing Then
            Dim typeInfo As Type = Nothing

            If typeInfo Is Nothing Then
                typeInfo = GetType(T)
            End If

            If typeInfo Is GetType(String) Then
                evaluation = EvaluationType.EvaluationString
            ElseIf typeInfo.GetProperty("DisplayName") IsNot Nothing Or typeInfo.GetMethod("DisplayName") IsNot Nothing Then
                evaluation = EvaluationType.EvaluationDisplayName
            ElseIf typeInfo.GetProperty("Name") IsNot Nothing Then
                evaluation = EvaluationType.EvaluationName
            ElseIf typeInfo.GetMethod("ToString") IsNot Nothing Then
                evaluation = EvaluationType.EvaluationToString
            End If

            If evaluation = EvaluationType.NoEvaluation Then
                Dim test As String
                Try
                    test = Me.Items(0).DisplayName
                    evaluation = EvaluationType.EvaluationDisplayName
                Catch
                    Try
                        test = Me.Items(0).Name
                        evaluation = EvaluationType.EvaluationName
                    Catch
                    End Try
                End Try
Configuration of the dialog and filling the listbox
In addition to some properties of the dialog, the ListBox is configured here, and the window is assembled. Much of this is automatically generated, only the content of the listbox is manually written.
The elements are entered into the list, taking into account the previously determined evaluation type. If an adapter was passed, the string list is obtained from it. The selection is set to the passed start index, if it is valid. The buttons are configured and the size of the dialog is adjusted.
        Me.Text = "Make a selection"
        Me.Width = 320
        Me.Height = 300

        Me.StartPosition = FormStartPosition.CenterScreen

        If Me.Adapter IsNot Nothing Then
            ListBox1.Items.AddRange(Me.Adapter.GetStringArray(Me.Items, count))
        Else
            For i As Integer = 0 To count - 1
                Select Case evaluation
                    Case EvaluationType.EvaluationString
                        ListBox1.Items.Add(CType(items(i), String))
                    Case EvaluationType.EvaluationDisplayName
                        ListBox1.Items.Add(items(i).DisplayName)
                    Case EvaluationType.EvaluationName
                        ListBox1.Items.Add(items(i).Name)
                    Case EvaluationType.EvaluationToString
                        ListBox1.Items.Add(items(i).ToString())
                    Case Else
                        ListBox1.Items.Add("no suitable evaluation type found")
                End Select
            Next
        End If
Methods for adjusting position and size
The two methods SetPos and AdjustWindowHeight are used to set the dialog to the desired position and adjust the height of the dialog. The position is set relative to the Inventor window, the height is adjusted so that the list does not become too long and the buttons do not stand too far down. The height of the dialog is set to the height of the buttons, the list and some distances. Here, a lot of tinkering was necessary because some often used methods and properties (e.g. ClientSize) for the window layout use classes from System.Drawing.Primitives that are apparently not available in Inventor. Since I was not able to import the required classes, I rewrote the methods to work without these classes. If anyone can tell me how to use these classes (e.g. Rectangle or Point), please let me know.
Update: In the meantime, I have found out that the blocked classes can be used in Inventor if the selection dialog is compiled as an external DLL and loaded in iLogic. This allows the size adjustment function to be used just as it is generated by Visual Studio.
    Public Sub SetPos(left As Integer, top As Integer)
        Me.StartPosition = FormStartPosition.Manual
        Me.Left = left
        Me.Top = top

    End Sub

    Public Sub AdjustWindowHeight(Optional maxHeight As Integer = 1000)

        Dim screenHeight As Integer = maxHeight

        Dim maxListBoxHeight As Integer = screenHeight \ 2
        Dim listBoxHeight As Integer = Math.Min(ListBox1.ItemHeight * ListBox1.Items.Count + 30, maxListBoxHeight)

        ListBox1.Height = listBoxHeight

        Dim buttonSpacing As Integer = 10
        Me.Height = ButtonOK.Height + 2 * buttonSpacing + ListBox1.Height + 50
    End Sub
Event handler for the listbox and the buttons
The event handlers determine what should happen when the user interacts. When an element in the list is selected, the index and the element are saved and the OK button is activated. When the OK button is pressed, the dialog is closed and DialogResult is set to OK. When the cancel button is pressed, DialogResult is set to Cancel and the dialog is closed.
In addition, an enumeration EvaluationType is defined, which allows the evaluation type to be easily set. Then the class ends.
      Private Sub ListBox_SelectedIndexChanged(sender As Object, e As EventArgs)
        SelectedIndex = ListBox1.SelectedIndex
        SelectedItem = CType(Items(SelectedIndex),T)
        ButtonOK.Enabled = (SelectedIndex >= 0)
    End Sub
    Private Sub ButtonOK_Click(sender As Object, e As EventArgs)
        Me.DialogResult = DialogResult.OK
        Me.Close()
    End Sub
    Private Sub ButtonCancel_Click(sender As Object, e As EventArgs)
        Me.DialogResult = DialogResult.Cancel
        Me.SelectedIndex = -1
        Me.Close()
    End Sub

    Private Enum EvaluationType
        NoEvaluation
        EvaluationString
        EvaluationToString
        EvaluationDisplayName
        EvaluationName
    End Enum
End Class
The adapter
In case the objects in the list do not have the desired properties, an adapter can be passed that reads the desired properties. The adapter must implement the IObjectAdapter interface and contain the GetStringArray method, which receives the objects in the list and the number of elements and returns a string array. Here is a simple example of an adapter that reads the DisplayName property from an Asset, just like the SelectionDialog class itself. Here you can write your own adapter for each object type that reads the desired properties, if you do not want to change the SelectionDialog for a single case.
Public Interface IObjectAdapter
    Function GetStringArray(items As IEnumerable, count As Integer) As String()
End Interface

Class AssetAdapter
    Implements IObjectAdapter

    Public Function GetStringArray(items As IEnumerable, count As Integer) As String() Implements IObjectAdapter.GetStringArray
        Dim names(count - 1) As String
        For i As Integer = 0 To count - 1
            names(i) = CType(items(i), Asset).DisplayName
        Next
        Return names
    End Function
End Class
The complete code
To use the SelectionDialog, you have to copy the imports, the SelectionDialog class and, if you want to use the adapter, also the IObjectAdapter interface and the adapter class you created into the iLogic rule. If the adapter is not needed at all, the argument in the constructor and the lines of code that use the adapter can be removed.
Here is the complete code that allows the selection of a material from the second material library.
Imports System.Windows.Forms
Imports System.Reflection

Sub Main()
    Dim invApp As Inventor.Application = ThisApplication
    Dim width As Integer = invApp.Width
    Dim height As Integer = invApp.Height
    Dim left As Integer = invApp.Left
    Dim top As Integer = invApp.Top
    Dim center As Point2d = invApp.TransientGeometry.CreatePoint2d(left + width \ 2, top + height \ 2)

    Dim materialSelectionDialog As New SelectionDialog(Of Asset)(invApp.AssetLibraries(2).MaterialAssets)
    materialSelectionDialog.Text = "Select material"
    materialSelectionDialog.ButtonOK.Text = "Select"
    materialSelectionDialog.AdjustWindowHeight(height)
    materialSelectionDialog.SetPos(center.X - materialSelectionDialog.Width \ 2, center.Y - materialSelectionDialog.Height \ 2)

    Dim material As Asset = Nothing
    Dim response As DialogResult = materialSelectionDialog.ShowDialog()
    If response = DialogResult.OK Then
        material = materialSelectionDialog.SelectedItem
    End If
    If material IsNot Nothing Then
        Logger.Info(material.DisplayName & " selected.")
    Else
        Logger.Info("No material selected.")
        Exit Sub
    End If
End Sub


Public Class SelectionDialog(Of T)
    Inherits Form

    Private ReadOnly ListBox1 As New ListBox()
    Friend ButtonOK As New Button()
    Friend ButtonCancel As New Button()

    Public Property SelectedIndex As Integer
    Public Property SelectedItem As T
    Private Property Adapter As IObjectAdapter
    Private Property Items As IEnumerable

    Public Sub New(items As IEnumerable, Optional adapter As IObjectAdapter = Nothing, Optional startIndex As Integer = -1)
        Dim count As Integer = 0
        Dim listTypeInfo As Type = items.GetType()
        Dim prop As System.Reflection.PropertyInfo
        prop = listTypeInfo.GetProperty("Length")
        If prop Is Nothing Then
            prop = listTypeInfo.GetProperty("Count")
        End If
        If prop IsNot Nothing Then
            count = prop.GetValue(items)
        Else
            Dim met As System.Reflection.MethodInfo
            met = listTypeInfo.GetMethod("Count")

            If met IsNot Nothing Then
                count = listTypeInfo.GetMethod("Count").Invoke(items, Nothing)
                count = met.Invoke(items, Nothing)
            Else
                For Each item As Object In items
                    count += 1
                Next
            End If
        End If


        Dim evaluation As EvaluationType = EvaluationType.NoEvaluation
        Me.Items = items
        'If adapter is Nothing, try the standard evaluation
        If adapter Is Nothing Then
            Dim typeInfo As Type = Nothing

            If typeInfo Is Nothing Then
                typeInfo = GetType(T)
            End If

            If typeInfo Is GetType(String) Then
                evaluation = EvaluationType.EvaluationString
            ElseIf typeInfo.GetProperty("DisplayName") IsNot Nothing Or typeInfo.GetMethod("DisplayName") IsNot Nothing Then
                evaluation = EvaluationType.EvaluationDisplayName
            ElseIf typeInfo.GetProperty("Name") IsNot Nothing Then
                evaluation = EvaluationType.EvaluationName
            ElseIf typeInfo.GetMethod("ToString") IsNot Nothing Then
                evaluation = EvaluationType.EvaluationToString
            End If

            ' try to find the evaluation by trial and error
            If evaluation = EvaluationType.NoEvaluation Then
                Dim test As String
                Try
                    test = Me.Items(0).DisplayName
                    evaluation = EvaluationType.EvaluationDisplayName
                Catch
                    Try
                        test = Me.Items(0).Name
                        evaluation = EvaluationType.EvaluationName
                    Catch
                    End Try
                End Try
            End If
        Else
            Me.Adapter = adapter
        End If
        ' Form settings
        Me.Text = "Make a selection"
        Me.Width = 320
        Me.Height = 300

        Me.StartPosition = FormStartPosition.CenterScreen

        ' Add ListBox
        ' If we have an adapter, we use it
        If Me.Adapter IsNot Nothing Then
            ListBox1.Items.AddRange(Me.Adapter.GetStringArray(Me.Items, count))
        Else
            For i As Integer = 0 To count - 1
                Select Case evaluation
                    Case EvaluationType.EvaluationString
                        ListBox1.Items.Add(CType(items(i), String))
                    Case EvaluationType.EvaluationDisplayName
                        ListBox1.Items.Add(items(i).DisplayName)
                    Case EvaluationType.EvaluationName
                        ListBox1.Items.Add(items(i).Name)
                    Case EvaluationType.EvaluationToString
                        ListBox1.Items.Add(items(i).ToString())
                    Case Else
                        ListBox1.Items.Add("no suitable evaluation type found")
                End Select
            Next
        End If
        ListBox1.Dock = DockStyle.Top
        AddHandler ListBox1.SelectedIndexChanged, AddressOf ListBox_SelectedIndexChanged
        Me.Controls.Add(ListBox1)

        ' Panel for buttons
        Dim panel As New FlowLayoutPanel()
        panel.FlowDirection = FlowDirection.RightToLeft
        panel.Dock = DockStyle.Bottom
        panel.Height = 40

        ' OK button
        ButtonOK.Text = "OK"
        ButtonOK.Enabled = False
        AddHandler ButtonOK.Click, AddressOf ButtonOK_Click
        panel.Controls.Add(ButtonOK)

        If startIndex < count - 1 Then
            Me.SelectedIndex = startIndex
        Else
            Me.SelectedIndex = -1
        End If

        If Me.SelectedIndex > -1 Then
            ListBox1.SelectedIndex = startIndex
            Me.SelectedItem = CType(Me.Items(startIndex),T)
        End If

        ' Cancel button
        ButtonCancel.Text = "Cancel"
        AddHandler ButtonCancel.Click, AddressOf ButtonCancel_Click
        panel.Controls.Add(ButtonCancel)

        Me.Controls.Add(panel)
        Me.MaximizeBox = False
        Me.MinimizeBox = False
        Me.AutoSize = True
        Me.AdjustWindowHeight()
    End Sub

    Public Sub SetPos(left As Integer, top As Integer)
        Me.StartPosition = FormStartPosition.Manual
        Me.Left = left
        Me.Top = top
    End Sub

    Public Sub AdjustWindowHeight(Optional maxHeight As Integer = 1000)

        ' Take over screen height
        Dim screenHeight As Integer = maxHeight

        ' Maximum height of the listBox (half screen height)
        Dim maxListBoxHeight As Integer = screenHeight \ 2

        ' Calculation of listBox height based on entries
        Dim listBoxHeight As Integer = Math.Min(ListBox1.ItemHeight * ListBox1.Items.Count + 30, maxListBoxHeight)

        ' Set listBox height
        ListBox1.Height = listBoxHeight

        ' Adjust window height (including buffer for edges)
        Dim buttonSpacing As Integer = 10
        Me.Height = ButtonOK.Height + 2 * buttonSpacing + ListBox1.Height + 50
    End Sub

    Private Sub ListBox_SelectedIndexChanged(sender As Object, e As EventArgs)
        SelectedIndex = ListBox1.SelectedIndex
        SelectedItem = CType(Items(SelectedIndex), T)
        ButtonOK.Enabled = (SelectedIndex >= 0)
    End Sub
    Private Sub ButtonOK_Click(sender As Object, e As EventArgs)
        Me.DialogResult = DialogResult.OK
        Me.Close()
    End Sub
    Private Sub ButtonCancel_Click(sender As Object, e As EventArgs)
        Me.DialogResult = DialogResult.Cancel
        Me.SelectedIndex = -1
        Me.Close()
    End Sub

    'Enumerator of evaluation types
    Private Enum EvaluationType
        NoEvaluation
        EvaluationString
        EvaluationToString
        EvaluationDisplayName
        EvaluationName
    End Enum
End Class

Public Interface IObjectAdapter
    Function GetStringArray(items As IEnumerable, count As Integer) As String()
End Interface

Class AssetAdapter
    Implements IObjectAdapter

    Public Function GetStringArray(items As IEnumerable, count As Integer) As String() Implements IObjectAdapter.GetStringArray
        Dim names(count - 1) As String
        For i As Integer = 0 To count - 1
            names(i) = CType(items(i), Asset).DisplayName
        Next
        Return names
    End Function
End Class
If you need more in-depth advice on CAD methods, please click on Contact.
Click the links to copy to clipboard
This page: https://r-kon.eu/cad-auswahldialog.php
The video: https://youtu.be/y739jWsr_fg (Youtube) / https://dai.ly/k4ssNpTHZtJkEhCvKHW (DailyMotion)